历史两日,终于在centos 6.0上搭建好了完整的LAMP开发环境,中间有很多麻烦,但还是一点点解决了。并且写好了这份安装文档,留给自己和以后再安装中遇到问题的人。予人玫瑰,手留余香。
一、搭建环境:
1、CentOS 6.0虚拟机(最小安装)
2、putty
3、ssh shell
二、准备工作:
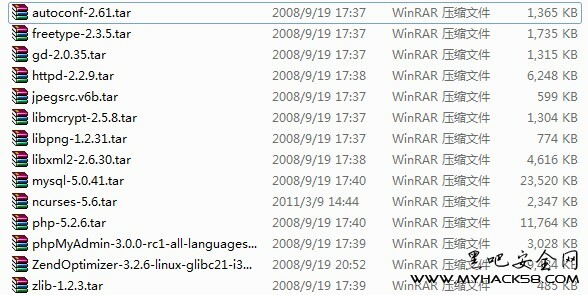
1、源码包
2、安装gcc、gcc-c++编译器(yum安装)
若虚拟机能联网,直接输入命令yum install gcc和yum install gcc-c++;若不能联网,将centos光盘镜像挂载上,修改yum的本地源,使机器从本地源yum方式安装
3、检查机器上是否已经安装了mysql、php、apache,使用命令rpm -qa mysql。若安装了,则使用命令rpm -e 包的全名 --nodeps卸载
4、关闭selinux,清空防火墙规则
5、开放80、3306、22端口
因为默认情况下,防火墙的80、3306、22端口是关闭的,这样的话对于客户机访问虚拟机上的web,会出现访问不到的现象。所以要开启。
service iptables stop
#/sbin/iptables -I INPUT -p tcp --dport 80 -j ACCEPT //那是大写的英文字母I,不是数字1
#/sbin/iptables -I INPUT -p tcp --dport 22 -j ACCEPT
#/sbin/iptables -I INPUT -p tcp --dport 3306 -j ACCEPT
然后保存:
#/etc/rc.d/init.d/iptables save
重启防火墙
service iptables restart
6、在linux下建立目录lamp,存放上传的源码
7、使用ssh shell将windows下下载好的14个源码包上传到/lamp
8、解包
因为包很多,这里编写shell脚本/lamp/tar.sh进行解包
tar.sh
- #!/bin/sh
- cd /lamp
- ls *.tar.gz > ls.list
-
- for TAR in `cat ls.list`
- do
- tar -zxvf $YAR
- done
执行脚本tar.sh进行解包
9、将源码包*.tar.gz全都删除
三、安装过程:
1、为方便操作,编写安装脚本/lamp/lamp.sh进行安装
lamp.sh
- cd /lamp/libxml2-2.6.30
- ./configure --prefix=/usr/local/libxml2/
- make
- make install
-
- cd /lamp/libmcrypt-2.5.8
- ./configure --prefix=/usr/local/libmcrypt/
- make
- make install
-
- cd /lamp/libmcrypt-2.5.8/libltdl
- ./configure --enable-ltdl-install
- make
- make install
-
- cd /lamp/zlib-1.2.3
- ./configure
- make
- make install
-
- cd /lamp/libpng-1.2.31
- ./configure --prefix=/usr/local/libpng/
- make
- make install
-
- mkdir /usr/local/jpeg6
- mkdir /usr/local/jpeg6/bin
- mkdir /usr/local/jpeg6/lib
- mkdir /usr/local/jpeg6/include
- mkdir -p /usr/local/jpeg6/man/man1
- cd /lamp/jpeg-6b
- ./configure --prefix=/usr/local/jpeg6/ --enable-shared --enable-static
- make
- make install
-
- cd /lamp/freetype-2.3.5
- ./configure --prefix=/usr/local/freetype/
- make
- make install
-
- cd /lamp/autoconf-2.61
- ./configure
- make
- make install
-
- cd /lamp/gd-2.0.35
- ./configure --prefix=/usr/local/gd2/ --with-jpeg=/usr/local/jpeg6/ --with-freetype=/usr/local/freetype/
- make
- make install
-
- cd /lamp/httpd-2.2.9
- ./configure --prefix=/usr/local/apache2/ --sysconfdir=/etc/httpd/ --with-included-apr --disable-userdir --enable-so --enable-deflate=shared --enable-expires=shared --enable-rewrite=shared --enable-static-support
- make
- make install
-
- /usr/local/apache2/bin/apachectl start
- echo "/usr/local/apache2/bin/apachectl start" >> /etc/rc.d/rc.sysinit
-
- cd /lamp/ncurses-5.6
- ./configure --with-shared --without-debug --without-ada --enable-overwrite
- make
- make install
-
- groupadd mysql
- useradd -g mysql mysql
- cd /lamp/mysql-5.0.41
- ./configure --prefix=/usr/local/mysql/ --with-extra-charsets=all
- make
- make install
-
- cp support-files/my-medium.cnf /etc/my.cnf
- /usr/local/mysql/bin/mysql_install_db --user=mysql
- chown -R root /usr/local/mysql
- chown -R mysql /usr/local/mysql/var
- chgrp -R mysql /usr/local/mysql
-
- /usr/local/mysql/bin/mysqld_safe --user=mysql &
-
- cp /lamp/mysql-5.0.41/support-files/mysql.server /etc/rc.d/init.d/mysqld
- chown root.root /etc/rc.d/init.d/mysqld
- chmod 755 /etc/rc.d/init.d/mysqld
- chkconfig --add mysqld
- chkconfig --list mysqld
- chkconfig --levels 245 mysqld off
-
- cd /lamp/php-5.2.6
- ./configure --prefix=/usr/local/php/ --with-config-file-path=/usr/local/php/etc/ --with-apxs2=/usr/local/apache2/bin/apx --with-mysql=/usr/local/mysql/ --with-libxml-dir=/usr/local/libxml2/ --with-jpeg-dir=/usr/local/jpeg6/ --with-freetype-dir=/usr/local/freetype/ --with-gd=/usr/local/gd2/ --with-mcrypt=/usr/local/libmcrypt/ --with-mysqli=/usr/local/mysql/bin/mysql_config --enable-soap --enable-mbstring=all --enable-sockets
- make
- make install
-
- cp php.ini-dist /usr/local/php/etc/php.ini
- echo "Addtype application/x-httpd-php .php .phtml" >> /etc/httpd/httpd.conf
- /usr/local/apache2/bin/apachectl restart 执行脚本,进行安装(时间很长,可以去睡觉了
 )
)
2、配置mysql
cd /usr/local/mysql
bin/mysqladmin version //简单的测试
bin/mysqladmin varibles //查看所有mysql参数
bin/mysql -u root //没有密码可以直接登录本机服务器
mysql> DELETE FROM mysql.user WHERE Host='localhost' AND User='';
mysql> FLUSH PRIVILEGES;
mysql> SET PASSWORD FOR 'root'@'localhost' = PASSWORD('123456');3、安装zend加速器
mkdir /usr/local/php/etccp php.ini-dist /usr/local/php/etc/php.ini //更改之前设定的php.ini的配置文件位置,安装zend要用
进入Zend包的目录
./install-tty4、phpmyadmin的安装与配置
cd /lamp
cp -a phpMyAdmin-3.0.0-rc1-all-languages /var/www/html/phpmyadmin //拷贝目录到指定位置(网站主目录/var/www/html下)并改名为phpmyadmin
cd /usr/local/apache2/htdocs/phpmyadmin/
cp config.sample.inc.php config.inc.php
进入/var/www/html/phpmyadmin
修改配置文件config.inc.php,将$cfg['blowfish_secret'] = '' 空格处填上登录phpmyadmin的密码,例如:$cfg['blowfish_secret'] = '123456'
四、常见错误及备注:
1、若shell脚本是从windows上传到linux上,而不是直接在linux上写的,可能会出现执行错误。解决办法见我的另一篇日志:《shell脚本在Linux下运行错误的解决方法》
2、对不能联网状态下yum本地安装的方法,见 《centos虚拟机不能联网状况下yum方式从本地安装软件包》
3、linux启动apache libltdl.so.3:cannot open shared object file:No such file or directory异常
执行ln -s /usr/local/lib/libltdl.so.3 /usr/lib/libltdl.so.3 即可
4、若出现Address already in use: make_sock: could not bind to address [::]:80异常
解决方法:reboot启动linux
5、若出现在linux终端执行clear或者top命令时出现:‘xterm’:unknown terminal type的错误,参考《在linux终端执行clear或top命令时出现:'xterm': unknown terminal type的错误》
6、文中源码包和tar.sh、lamp.sh脚本的下载 点击下载 提取码:dn9qqc4x
7、若有其他错误,请百度寻找答案,或者给我发邮件guoyin0612@163.com


 渝公网安备 50024202000196号

 QQ空间
QQ空间 新浪微博
新浪微博 开心网
开心网 人人网
人人网